Terrible shame, of course, that I had to buy a road bike for the challenge! Although it wasn’t quite as fun as I thought having only £500 to spend and being used to a £2000 custom made mountain bike! Luckily, Steve came to the rescue and lent me his for a month or two, which let me figure out what sort of bits I would be after, and soon I was on eBay every day and night waiting for that gem to come up. I refused to buy anything that was heavier than my 10kg mountain bike and it was a little disappointing to see how low specced the bikes were for the budget. However, my perseverance paid off and I swiped a buy-it-now offering within hours of it being posted.
[warning – techincal geeky stuff below]
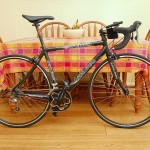
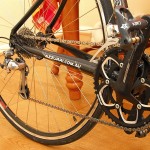
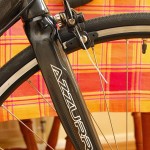
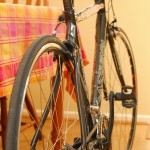
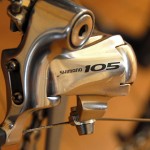
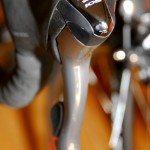
What a bike! For £420 I honestly couldn’t have done any better. The frame is a beautiful carbon fibre Azzurri Primo creation which I am really starting to love. The guy I got it from had bought the frame and tried to fit his selection of components himself. I have since tweaked and fettled with it to fix a few things here and there. And boy were there some things to fix! One of the cable lugs had come away from the carbon frame, but was fixed as good as new with a new aluminium rivet and some epoxy. The rear cassette was missing a spacer so each sprocket was sliding around by 0.5mm (how the previous owner didn’t spot that I’ll never know), fixed with a 50p spacer from the local bike shop. The 70mm stem (on a road bike?!?) was replaced with a 110mm version and the 250mm seat post was replaced with a 350mm carbon jobby. Then I set up all the gears only to realise that the rear mech was misaligned due to the replaceable dropout being slightly recessed into the frame. A washer sorted that out and it was as good as new. The latest fix was realising that the bearing collars in the bottom bracket had been put in with the flange facing inwards, which meant one of them soon fell out into the cavity in the middle creating 1 mm of slop in the cranks . Swapping them around quickly solved that problem.
Here are some pictures so you can see my trusty steed!


[warning – even more techincal geeky stuff below]
For navigation I was all set to buy a £270 all singing all dencing Garmin Edge, but I just couldnt bring myself to part with the cash. So I started to look into other options and already having an iPhone decided to use this. Luckily I managed to find a Dahon iPhone bike mount, which does a pretty good job of mounting your iPhone safely on your handlebar, and it is relatively waterproof as a bonus. It does the job, although the quality isnt as good as it should be for £40! Then after a survey of the different GPS bike tracking iPhone apps I decided to pay my £2.59 for EveryTrail, which has turned out to be excellent so far. You can plan a route online, download it onto your iPhone then download all the map tiles you need for the route (the best bit) so you are all set to go, regardless of 3G phone reception. Then EveryTrail uses the phone’s GPS to track you and if you take photos along the way it will geotag those too. Finally once you have finished you upload the actual route you took (and the photos) which appears in your EveryTrail account and that route can be added to a blog, like this one! Much less complicated than it sounds I assure you!
So the next problem was that my iPhone only lasts for 2 hours with the GPS and screen constantly on. To fix this I put together a 2.3Ah 14.8V lithium ion battery pack which will also power my light (a Tiger light of course). I built in a 5V DC-DC converter to the pack and the necessary circuit to appear as a charger to the iphone. Voila! This pack increases the iPhone battery life to about 10 – 12 hours, plenty for a days riding. And the whole setup looks very clean on the bike, see the photos below.
 |
 |